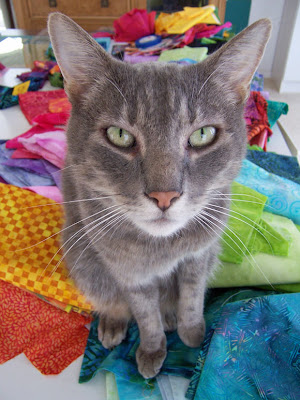
 Here's a picture of my favorite sewing room companion, Mr. Bigglesworth. Doesn't he look soft? He is. He's such a sweetie. Nice picture of him too, eh?
The reason I wanted to show you this picture of Mr. Bigglesworth today (other than the fact that I think he's incredibly handsome) is that I wanted to offer you some picture-taking tips. First of all, a disclaimer: I am NOT a good photographer. I've never taken a class, read a full book on picture-taking, know what an ISO is, or what constitutes a "good" lens. I have an inexpensive point-and-shoot camera that is always set on "auto."
That disclaimer out in the open, I want share some of the things I've learned that have helped me take some passable blog pictures. Take or leave any advice, and consider the source. You've been warned.
That disclaimer disclosed, my first piece of advice to you is NOT that you should go out and buy a fancy camera. This is my camera, an inexpensive 5 megapixel Kodak Easyshare Z730
I LOVE my camera. Our family has owned three Kodak Easyshares, and they've all been fantastic for our skill level. I previously owned an expensive and complicated Canon A70 camera, but I could only manage blurry pictures with it and it died a horrible death after only one year! (It stayed alive only long enough for the warranty to expire.) I'm glad it died. I hated that thing.
My Z730 camera is a couple of years old now, so there are newer, more megapixel versions of my camera, like the Z1285. If I lost or broke my camera, I would get the Z1285
to replace it.
Whichever camera you choose, make sure it has a close-up feature on it. See the picture of my camera below? See the flower and the mountain? The mountain is for far-away pictures, and the flower is for close-ups. When I turn my camera on, the focus is set somewhere in between "flower" and "mountain," so if I want to take a close-up, I push the flower button. Everything else stays on auto! On your camera, it may say, "close-up" or "macro." Find it. It's soooo important.
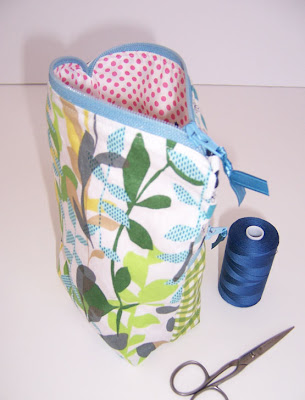
 The close-up feature lets you get up close and personal with your subject. Look at this close-up of my pouch. I love close-up pictures; they really draw you in. So often, people stand too far back and you can't see any detail! When you go shopping or look at a quilt in a show, don't you like to get really, really close? I know I do.
 The next thing you should do is turn off your flash. Leave your camera on the auto setting, but just turn off the flash feature. Flash is horrible. It burns out color, startles the subject, turns eyes red, wrecks the background by making it too dark in the distance, and "flattens" the subject. Of course, if it's too dark, you have to use flash...but try turning it off if you can. Natural light is softer, the colors are truer, and the subject has so much more depth.
Here are two pictures of my pouch. The first is using natural light only:
And below is the flash version. I didn't turn on the flash on purpose, it came on automatically. I have to turn my flash off on purpose in even in slightly diminished light--it wants to flash even though there is sufficient light!) See the shadows? The washed-out fabric? The "flat" look of the whole picture? I'll admit, this is not the greatest example, but I think you'll see what I mean if you really start looking at great pictures and see how natural light gives them much more life.
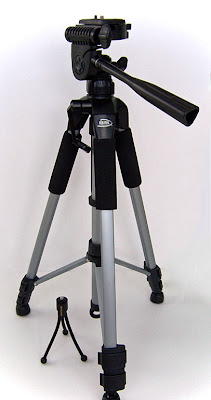
 The problem, of course, with turning off your flash in low light, is that your pictures can come out blurry. The lens has to stay open longer to compensate and even slight shaking of the camera will blur the picture. That's why you need one of these:
 Tripods are not just for professionals. I have two tripods and I use them both. They're essential! It's so hard for me to hold the camera still when I take a picture, especially in low light. A tripod steadies the camera so you can use natural light more, even in low light situations. I have two tripods
Another essential item is white foam core board. I have two pieces of foam core that I use as backdrops. On all my pictures with white backgrounds (like the pouch and the tripod pictures above), I set the item on one piece and use the other piece behind the subject. The white reflects the light softly and makes a very nice background. Some people tape four pieces of foam core together in an open box shape and use that as a little photo studio for small items. The white sides help reflect more light on the subject so that you don't have to use flash.
I also drape fabrics on my foam core boards and set the items on the draped fabric. It makes a nice little photo "booth."
So get a decent camera with a close-up setting, turn off your flash and get a tripod, then go buy some foam core board. And if you really want to do it right, you need this:
 Photoshop Elements
. Amazing. It corrects hue, lighting, skin tone, distortion, blur, crookedness...downright amazing. There is a steep learning curve, though, so be prepared to read a manual or something. It's the "lite" version of Photoshop, but I can't imagine that they left anything out...it's so fantastic! I learn something new every day. I correct EVERY picture on Photoshop Elements before you see it, usually using the "autofix" feature. Oh yeah, and the tool straightens out crooked pictures because I can't seem to take a level picture for anything.
And it also helps to have some great things around to take pictures of! Here are my Squiggle blocks so far:
 I'm in love with these blocks. I've got half the blocks made, and I love making them!
And with Photoshop Elements, I can make one quilt, but see it in all different colors:
 Photoshop Elements: amazing. Marsha's Squiggle design: genius.


18 comments:
Greaqt photo-tips! I think I need that background-foamboard-thing set up....
I don't use photoshop, but a free alternative: Googles Picasa, which available for free online. But then, my pictures are not as pretty as yours....
Thanks for the tips! I´ve my Canon PowerShot with 8 mega pixels, but I must say I liked my older camera more. I still have to learn more about Photoshop systems etc. We get all the time more wet snow...
I sure do need these tips. Thanks for sharing. Now to go practice.
I noticed the reflection of the tripod in your tea pot photograph. That tea pot is really reflective!! Knew right away what I was doing wrong, well one thing. The other is I have been experimenting with when and when not to use the flash. You have really clarified that for me.
Thanks teacher!!!
Your quilt is coming along swimmingly!! (A little Box Jelly humour.) Can't wait to see how you quilt it.
Thanks for the photo tips! Especially about the foam cores, I haven't thought of using something like that. My DH got me a Photoshop Element last Xmas, but I haven't learn how to use it yet. I'm really technology challenged! lol
Love your Squiggles quilt!
What great tips!! Thank you! I also love your jellies - I am going to have to try the technique soon - I am preparing for a quilt show soon so I am very busy finishing my challenge for that one.
Good photo tips. Practice makes perfect. I think I might have to practice more than others! Still trying to solve blog mystery why some photos magnify for closer detail and some don't!
Great tips, I feel like this was my own personal tutorial, given the problems I have with pictures. .
I love the squiggles quilt!! I am trying though to find the directions on Marsha's site. . I guess I will email her, cuz I hafta make that one, too.
Duh. found it. Dec. 18 2007 post at threadbare. got a little impatient!
Those squiggles are soooo cute! (As is Mr. Bigglesworth.)
Thanks so much for the tips. I always wondered what the little flower was?
Love your squiggles, love the pouch, love Mr.B, and love the photo tips! I'm feeling the urge to go to my room and make stuff. Thanks for the inspiration!
very good tutorial...i love the blocks. i am inspired to make one with my hand dyes...i told the gal you got design from i think she is creating "squigglemainia" which you seem to have a pretty bad case of. also, the bag is cute. gotta go dye some more fabric
Thanks for the tips. I had to stop reading and look for the flower on my camera. Found it! My pictures will no doubt improve now.
Thanks for the photo tips. I will definitely get them a try. I love all the pouches you make too cute. And love the squiggles quilt. Looks like square jelly fish. Great job, Lisa.
I have that same camera and LOVE LOVE LOVE it! Thanks for the great photo tips!
A friend just bought one of your patterns and had it sent to me - as I collect turtles - so now I am checking your blog too! Great stuff!
Good to see Mr Bigglesworth left the curtains! He is really gorgeous!
I’m totally in love with your squiggles-quilt!
I love that shot of Mr. Bigglesworth. He's *so* handsome. :)
Post a Comment